AI-powered apps are a popular trend in the tech community, with many amazing AI-powered apps already out there. If you're interested in building your own AI app, leveraging the power of the OpenAI API is a great place to start.
In this blog post, we'll show you how to use the OpenAI API in a vanilla JavaScript app, providing you with a solid foundation to kickstart your journey in building your own AI-powered applications. We'll also explore the concept of streaming completions from the OpenAI API, which will allow us to enhance the user experience.
We will build an HTML, Tailwind CSS, and vanilla JavaScript app where the user enters a prompt, and OpenAI responds to that prompt. The response is displayed to the user in real-time similar to ChatGPT. Check out the demo below to see what we'll be building:
To work with the OpenAI API, you will need an API key. If you haven't already, sign up on the OpenAI platform and generate a new API key. Be sure to copy and securely store your API key, as it will be required for accessing OpenAI's API services.
To begin, create a folder named ai-javascript. Within this folder, create an index.html file and an index.js file. The HTML file will contain the HTML and CSS for our app, while the JavaScript file will contain the functions to communicate with OpenAI API and update the UI with the fetched response.
As fetch requests don't work with the file:// protocol due to security restrictions, install live-server extension in VS Code, a development server with live reload capability.
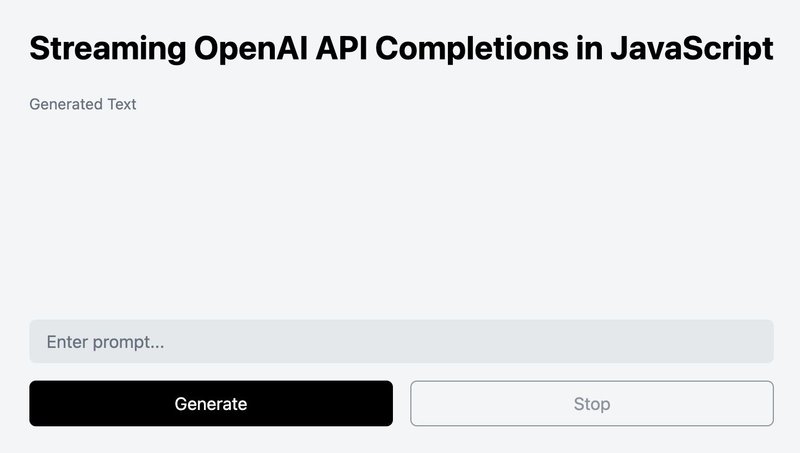
The user interface is built using HTML and Tailwind CSS, but you can use any styling solution of your choice. If you prefer Tailwind CSS, copy and paste the code below into your index.html file:
<!DOCTYPE html>
<html lang="en">
  <head>
    <meta charset="UTF-8" />
    <meta http-equiv="X-UA-Compatible" content="IE=edge" />
    <meta name="viewport" content="width=device-width, initial-scale=1.0" />
    <script src="<https://cdn.tailwindcss.com>"></script>
    <title>Streaming OpenAI API Completions in JavaScript</title>
    <script type="module" src="index.js"></script>
  </head>
  <body
    class="bg-white text-black min-h-screen flex items-center justify-center"
  >
    <div class="lg:w-1/2 2xl:w-1/3 p-8 rounded-md bg-gray-100">
      <h1 class="text-3xl font-bold mb-6">
        Streaming OpenAI API Completions in JavaScript
      </h1>
      <div id="resultContainer" class="mt-4 h-48 overflow-y-auto">
        <p class="text-gray-500 text-sm mb-2">Generated Text</p>
        <p id="resultText" class="whitespace-pre-line"></p>
      </div>
      <input
        type="text"
        id="promptInput"
        class="w-full px-4 py-2 rounded-md bg-gray-200 placeholder-gray-500 focus:outline-none mt-4"
        placeholder="Enter prompt..."
      />
      <div class="flex justify-center mt-4">
        <button
          id="generateBtn"
          class="w-1/2 px-4 py-2 rounded-md bg-black text-white hover:bg-gray-900 focus:outline-none mr-2 disabled:opacity-75 disabled:cursor-not-allowed"
        >
          Generate
        </button>
        <button
          id="stopBtn"
          disabled
          class="w-1/2 px-4 py-2 rounded-md border border-gray-500 text-gray-500 hover:text-gray-700 hover:border-gray-700 focus:outline-none ml-2 disabled:opacity-75 disabled:cursor-not-allowed"
        >
          Stop
        </button>
      </div>
    </div>
  </body>
</html>
In the head section, we link to the Tailwind CSS CDN and index.js. In the body section, we have an input element, a button to start generating the AI response, and a button to stop the generation.
Above the input, we have an empty section to populate the content retrieved from the API. With the code in place, run the command live-server from the ai-javascript folder terminal to launch the default browser and render the HTML and CSS from our index.html file.
Note that cdn.tailwindcss.com should not be used in production. To use Tailwind CSS in production, install it as a PostCSS plugin or use the Tailwind CLI. Check the Tailwind CSS installation documentation for details.
Now, let's move on to the JavaScript code responsible for connecting to OpenAI and updating the UI with the completion.
Store the completion API endpoint and the OpenAI API key in constants.
const API_URL = "<https://api.openai.com/v1/chat/completions>";
const API_KEY = "YOUR_API_KEY";
Be sure not to commit your API key to the source control.
Get hold of the prompt input, the generate and stop buttons, and the result section.
const promptInput = document.getElementById("promptInput");
const generateBtn = document.getElementById("generateBtn");
const stopBtn = document.getElementById("stopBtn");
const resultText = document.getElementById("resultText");The OpenAI completion request should be triggered on click of the Generate button or when the user presses the Enter key when the prompt input is in focus. Execute a function called generate() which we will define next.
Trigger the OpenAI completion request with the click of the Generate button or when the user presses the Enter key while the prompt input is in focus. Execute a function called generate(), which we'll define next:
promptInput.addEventListener("keyup", (event) => {
  if (event.key === "Enter") {
    generate();
  }
});
generateBtn.addEventListener("click", generate);Next, we define a function called generate that will establish a connection with the OpenAI API endpoint using the prompt input value. Using the received response, we update the result DOM element inner text to display the completion in the UI.
const generate = async () => {

  try {
    // Fetch the response from the OpenAI API with the signal from AbortController
    const response = await fetch(API_URL, {
      method: "POST",
      headers: {
        "Content-Type": "application/json",
        Authorization: `Bearer ${API_KEY}`,
      },
      body: JSON.stringify({
        model: "gpt-3.5-turbo",
        messages: [{ role: "user", content: promptInput.value }],
      }),
    });

    const data = await response.json();
    resultText.innerText = data.choices[0].message.content;
  } catch (error) {
    console.error("Error:", error);
    resultText.innerText = "Error occurred while generating.";
  }
};
In the code above, we are using the fetch API to make a POST request to the OpenAI completions API endpoint, passing the following parameters:
method: set toPOSTas this is required by the API.headers: set to an object containing two keys,Content-TypeandAuthorization. TheContent-Typekey is set toapplication/jsonand theAuthorizationkey is set toBearerfollowed by the API key provided by OpenAI.body: set to a JSON string containing themodelID to use for the completion and thepromptmessage that needs to be sent to OpenAI for completion. Both are mandatory.
From the response object received, we extract the completion text and update the result DOM element inner text to display it on the UI.
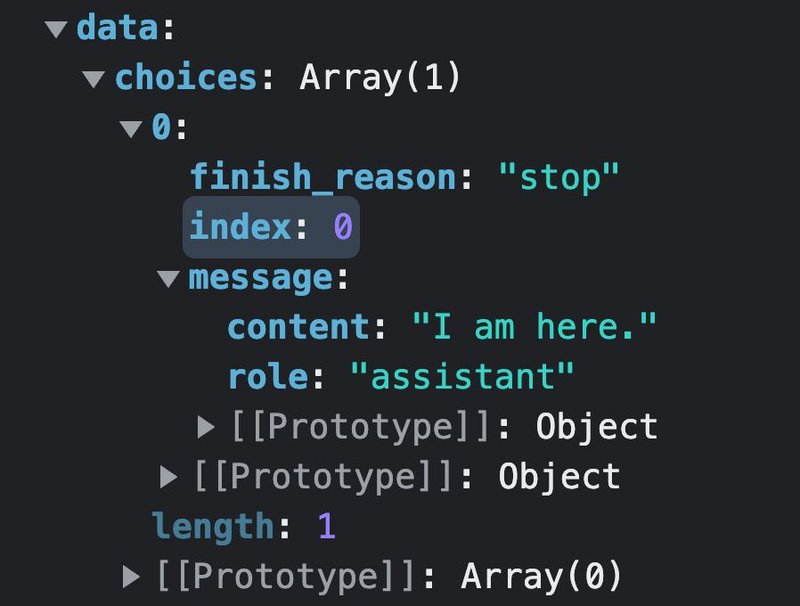
When we receive the response from the OpenAI API, it includes a key called choices. By default, this key will be an array with one object. This object contains a nested object with the key message. The message object, in turn, includes a key called content which holds the completion.
To display the completion in the UI, we need to access this value and update the inner text of the result element. An example of the output can be seen in the visualization below.
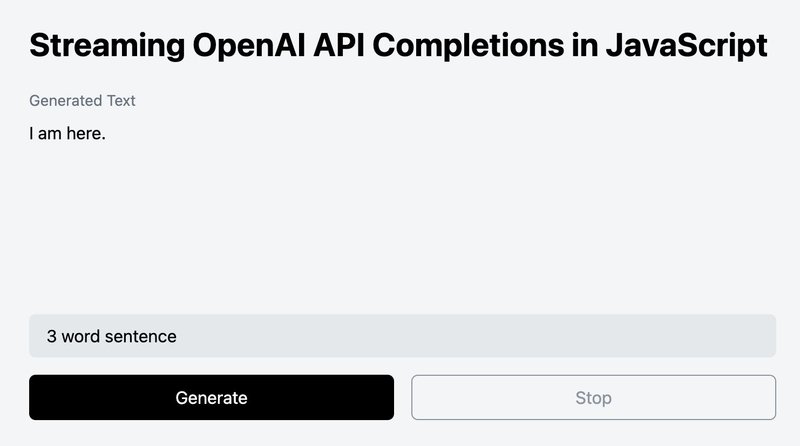
With the successful connection to the OpenAI API and the creation of completions for our prompts, our small AI assistant is now fully functional!
By default, the OpenAI API generates the entire completion before sending it back in a single response. However, if you're generating long completions, waiting for the response can take many seconds.
To mitigate this delay, you can 'stream' the completion as it's being generated. This allows you to start printing or processing the beginning of the completion before the full completion is finished.
Unfortunately, at present, there is no easy way to stream the response, and a significant amount of code is required to achieve this. But don't worry, we will break down the implementation process into digestible chunks, even for a complete beginner!
The first step in implementing streaming completions is to enable the stream option to true. This option will send partial message deltas, similar to what's done in ChatGPT. Here's an example:
body: JSON.stringify({
  model: "gpt-3.5-turbo",
  messages: [{ role: "user", content: promptInput.value }],
  stream: true, // For streaming responses
}),The next step is to read the stream of data returned from the OpenAI API. Here's how you can do it:
...
try {
    const response = fetch(...)

    // Read the response as a stream of data
    const reader = response.body.getReader();
    const decoder = new TextDecoder("utf-8");
    resultText.innerText = "";

    while (true) {
      const { done, value } = await reader.read();
      if (done) {
        break;
      }
      // Massage and parse the chunk of data
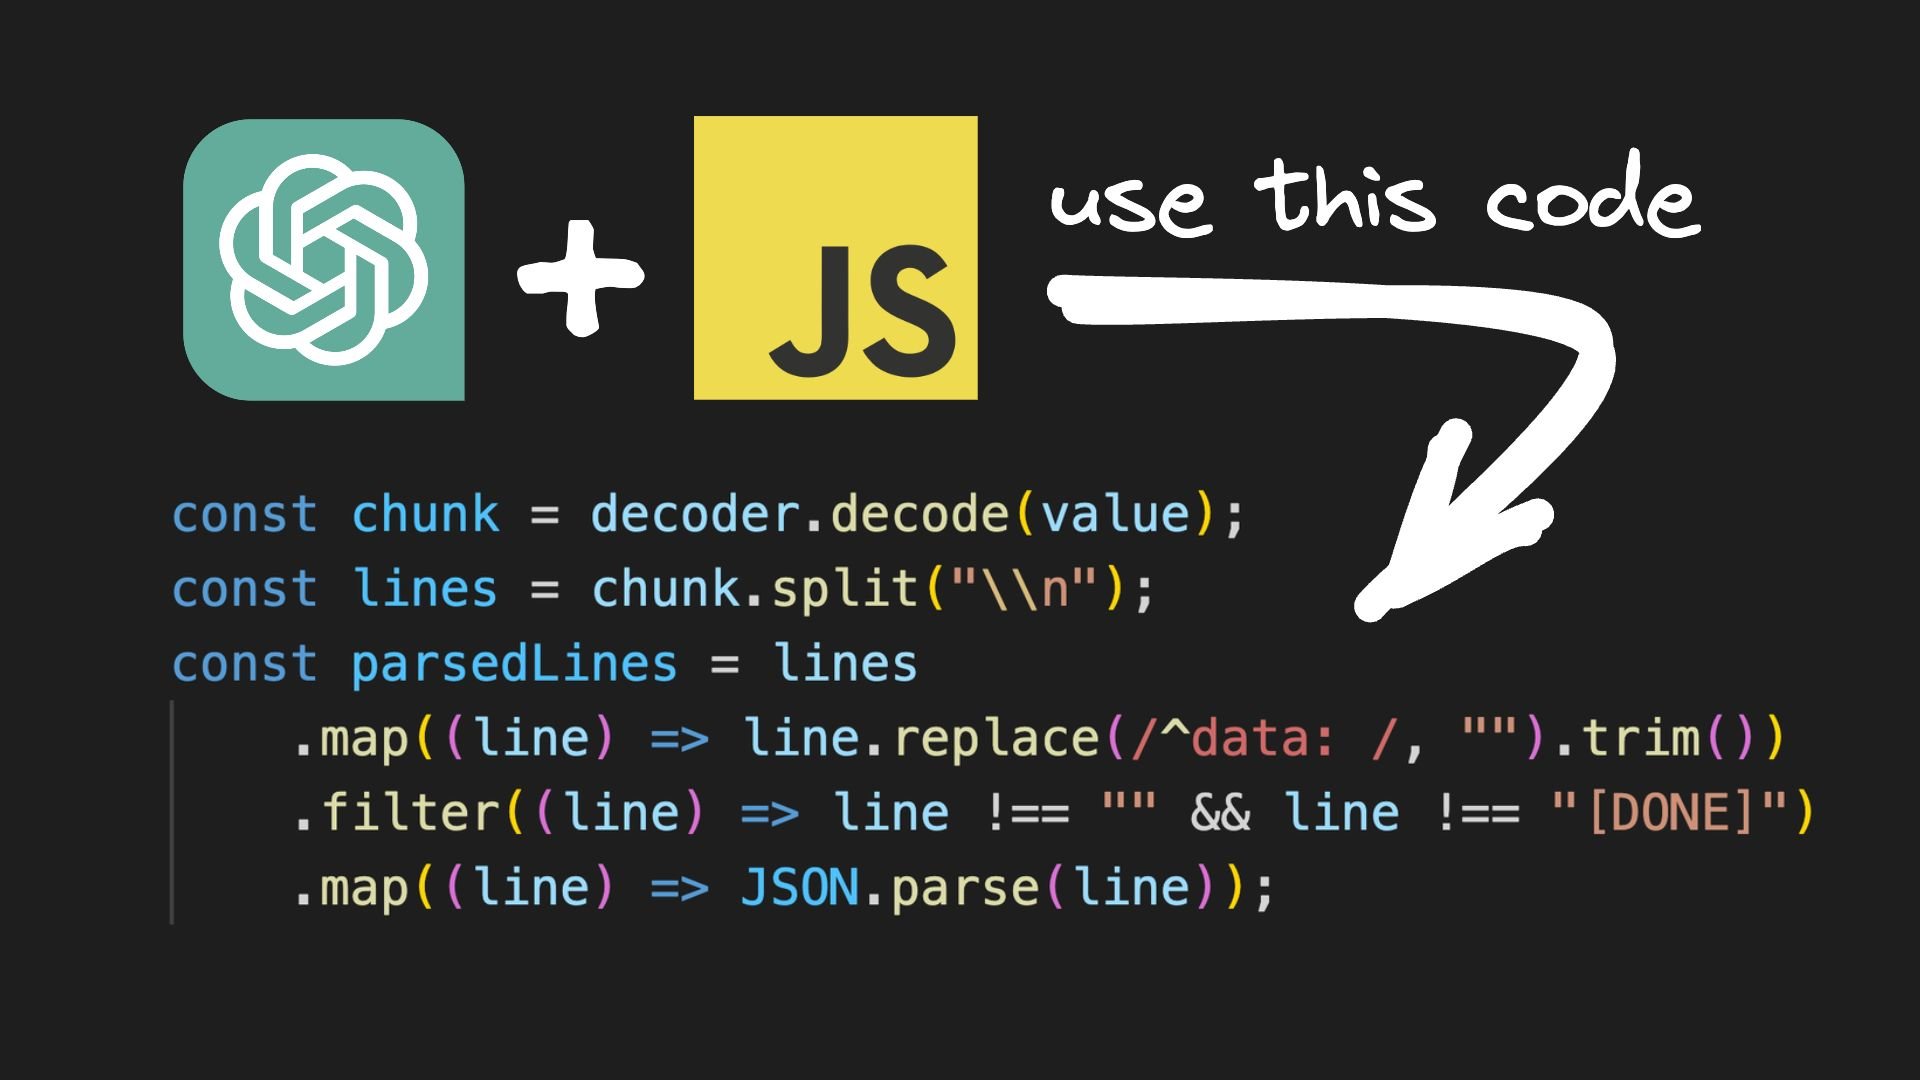
      const chunk = decoder.decode(value);
      const lines = chunk.split("\\n");
      const parsedLines = lines
        .map((line) => line.replace(/^data: /, "").trim()) // Remove the "data: " prefix
        .filter((line) => line !== "" && line !== "[DONE]") // Remove empty lines and "[DONE]"
        .map((line) => JSON.parse(line)); // Parse the JSON string

      for (const parsedLine of parsedLines) {
        const { choices } = parsedLine;
        const { delta } = choices[0];
        const { content } = delta;
        // Update the UI with the new content
        if (content) {
          resultText.innerText += content;
        }
      }
    }
} catch() {
	...
}
Here’s the breakdown of the code:
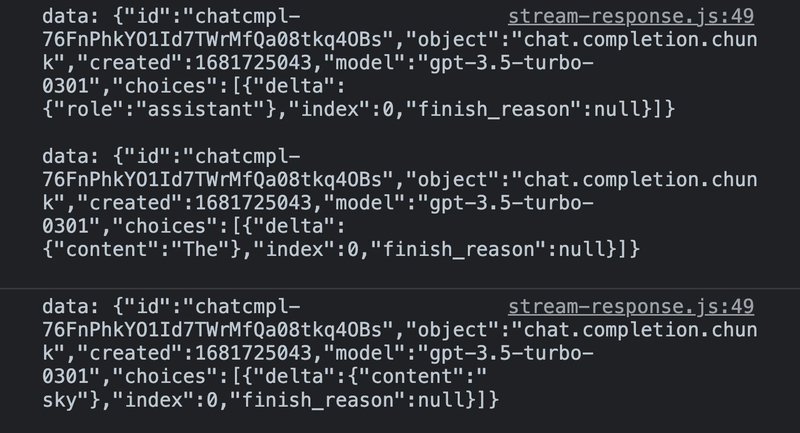
const reader = response.body.getReader();: This line initializes aReadableStreamDefaultReaderobject namedreaderto read data from the response body in a streaming manner.const decoder = new TextDecoder("utf-8");: This line initializes aTextDecoderobject nameddecoderwith the UTF-8 encoding. TheTextDecoderAPI is used to decode binary data.resultText.innerText = "";: This line clears the inner text of the element where the parsed data will be displayed.while (true) { ... }: This sets up an infinite loop that will repeatedly read, decode, parse, and update the UI with data from the response body until the loop is explicitly broken using abreakstatement.const { done, value } = await reader.read();: Inside the loop, theread()method is called on thereaderobject using anawaitstatement, which returns a promise that resolves to an object containing thedoneandvalueproperties.doneis a boolean value indicating whether the stream has ended, andvalueis aUint8Arraycontaining the chunk of binary data read from the response body.if (done) { break; }: This checks ifdoneistrue, which indicates that the entire response body has been read, and if so, breaks out of the loop to stop reading further data from the response body.const chunk = decoder.decode(value);: This line uses thedecode()method of theTextDecoderobject to decode the binary data invalueinto a string using the UTF-8 encoding, and stores it in thechunkvariable. This allows you to access and process the received data as text. Below is a comparison ofvaluevschunkfrom the response.
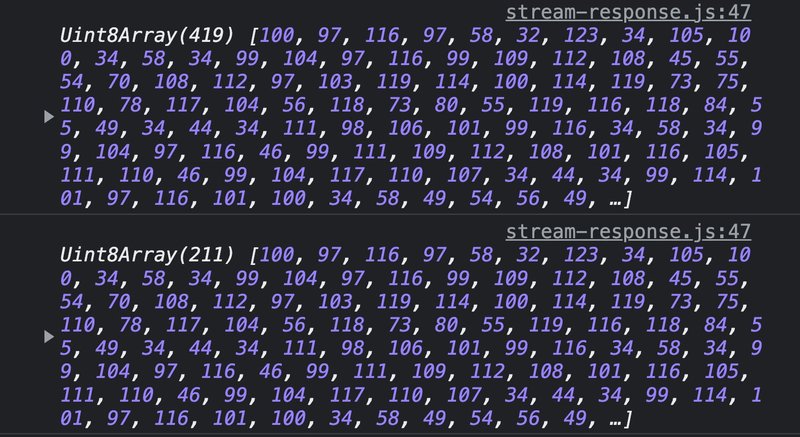
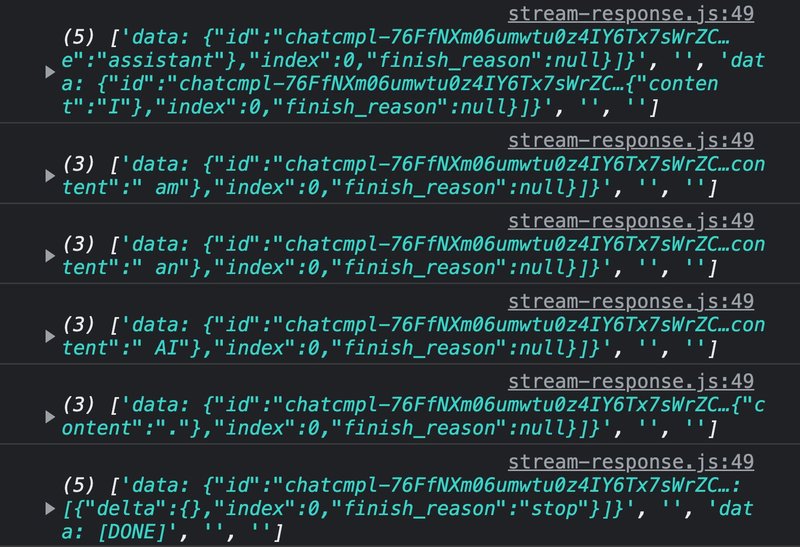
const lines = chunk.split("\\n");: This line splits thechunkstring into an array of strings at each newline character ("\n"). Each line in thechunkstring represents a separate piece of data. Below we have each chunk after the split.
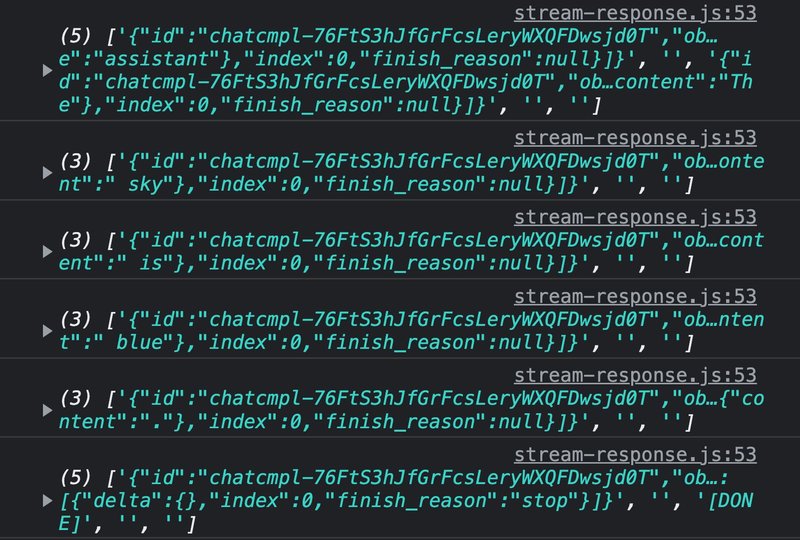
.map((line) => line.replace(/^data: /, "").trim()): This line uses the.map()method to iterate through each line in thelinesarray and removes the "data: " prefix from the beginning of each line using a regular expression (/^data: /) and then trims any leading or trailing white spaces from each line using the.trim()method. This is required as lines in thechunkstring are formatted as "data: " followed by the actual data. Below we have the same array with "data: " prefix removed.
.map((line) => JSON.parse(line)): This line uses the.map()method to iterate through each line in the filtered array and parses each line as a JSON string constructing the JavaScript object for us to work with.for (const parsedLine of parsedLines) { ... }: This sets up a for...of loop to iterate through each parsed line in the parsedLines array, which now contains JavaScript objects.
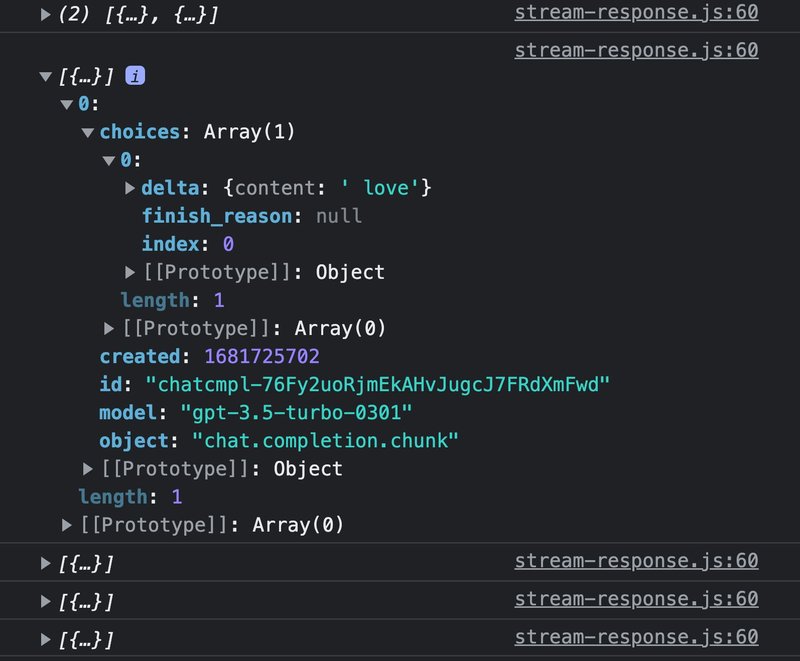
The data we are interested in is accessible at choices → first object in the array → delta → content, which is the code present within the loop. The content can also be an empty string, so it is checked before updating the UI. The following image displays the data extracted from the response:

As mentioned earlier, there is no simple approach to accomplish this task without utilizing a library. The purpose of this is not to make it complicated but rather to aid in your comprehension of how to stream OpenAI API completions from scratch. By now, you should have a better understanding of this process.
To avoid incurring unnecessary expenses, it's important to have the ability to stop generations in the middle of a completion. This can easily be achieved by using an AbortController.
To further enhance the user experience, it's a good idea to disable and enable the Generate and Stop buttons appropriately. We've included the complete JavaScript file below, but make sure to replace your API key if you decide to use this code.
const API_URL = "<https://api.openai.com/v1/chat/completions>";
const API_KEY = "YOUR_API_KEY";

const promptInput = document.getElementById("promptInput");
const generateBtn = document.getElementById("generateBtn");
const stopBtn = document.getElementById("stopBtn");
const resultText = document.getElementById("resultText");

let controller = null; // Store the AbortController instance

const generate = async () => {
  // Alert the user if no prompt value
  if (!promptInput.value) {
    alert("Please enter a prompt.");
    return;
  }

  // Disable the generate button and enable the stop button
  generateBtn.disabled = true;
  stopBtn.disabled = false;
  resultText.innerText = "Generating...";

  // Create a new AbortController instance
  controller = new AbortController();
  const signal = controller.signal;

  try {
    // Fetch the response from the OpenAI API with the signal from AbortController
    const response = await fetch(API_URL, {
      method: "POST",
      headers: {
        "Content-Type": "application/json",
        Authorization: `Bearer ${API_KEY}`,
      },
      body: JSON.stringify({
        model: "gpt-3.5-turbo",
        messages: [{ role: "user", content: promptInput.value }],
        max_tokens: 100,
        stream: true, // For streaming responses
      }),
      signal, // Pass the signal to the fetch request
    });

    // Read the response as a stream of data
    const reader = response.body.getReader();
    const decoder = new TextDecoder("utf-8");
    resultText.innerText = "";

    while (true) {
      const { done, value } = await reader.read();
      if (done) {
        break;
      }
      // Massage and parse the chunk of data
      const chunk = decoder.decode(value);
      const lines = chunk.split("\\n");
      const parsedLines = lines
        .map((line) => line.replace(/^data: /, "").trim()) // Remove the "data: " prefix
        .filter((line) => line !== "" && line !== "[DONE]") // Remove empty lines and "[DONE]"
        .map((line) => JSON.parse(line)); // Parse the JSON string

      for (const parsedLine of parsedLines) {
        const { choices } = parsedLine;
        const { delta } = choices[0];
        const { content } = delta;
        // Update the UI with the new content
        if (content) {
          resultText.innerText += content;
        }
      }
    }
  } catch (error) {
    // Handle fetch request errors
    if (signal.aborted) {
      resultText.innerText = "Request aborted.";
    } else {
      console.error("Error:", error);
      resultText.innerText = "Error occurred while generating.";
    }
  } finally {
    // Enable the generate button and disable the stop button
    generateBtn.disabled = false;
    stopBtn.disabled = true;
    controller = null; // Reset the AbortController instance
  }
};

const stop = () => {
  // Abort the fetch request by calling abort() on the AbortController instance
  if (controller) {
    controller.abort();
    controller = null;
  }
};

promptInput.addEventListener("keyup", (event) => {
  if (event.key === "Enter") {
    generate();
  }
});
generateBtn.addEventListener("click", generate);
stopBtn.addEventListener("click", stop);
Here’s the complete source code for your reference.
If you're interested in exploring more AI-powered content, we at Builder offer AI-powered Figma designs and UI content generation to satisfy your appetite for cutting-edge technology. Give it a try and see how AI can revolutionize your workflow.
Builder.io visually edits code, uses your design system, and sends pull requests.
Builder.io visually edits code, uses your design system, and sends pull requests.


 Connect a Repo


